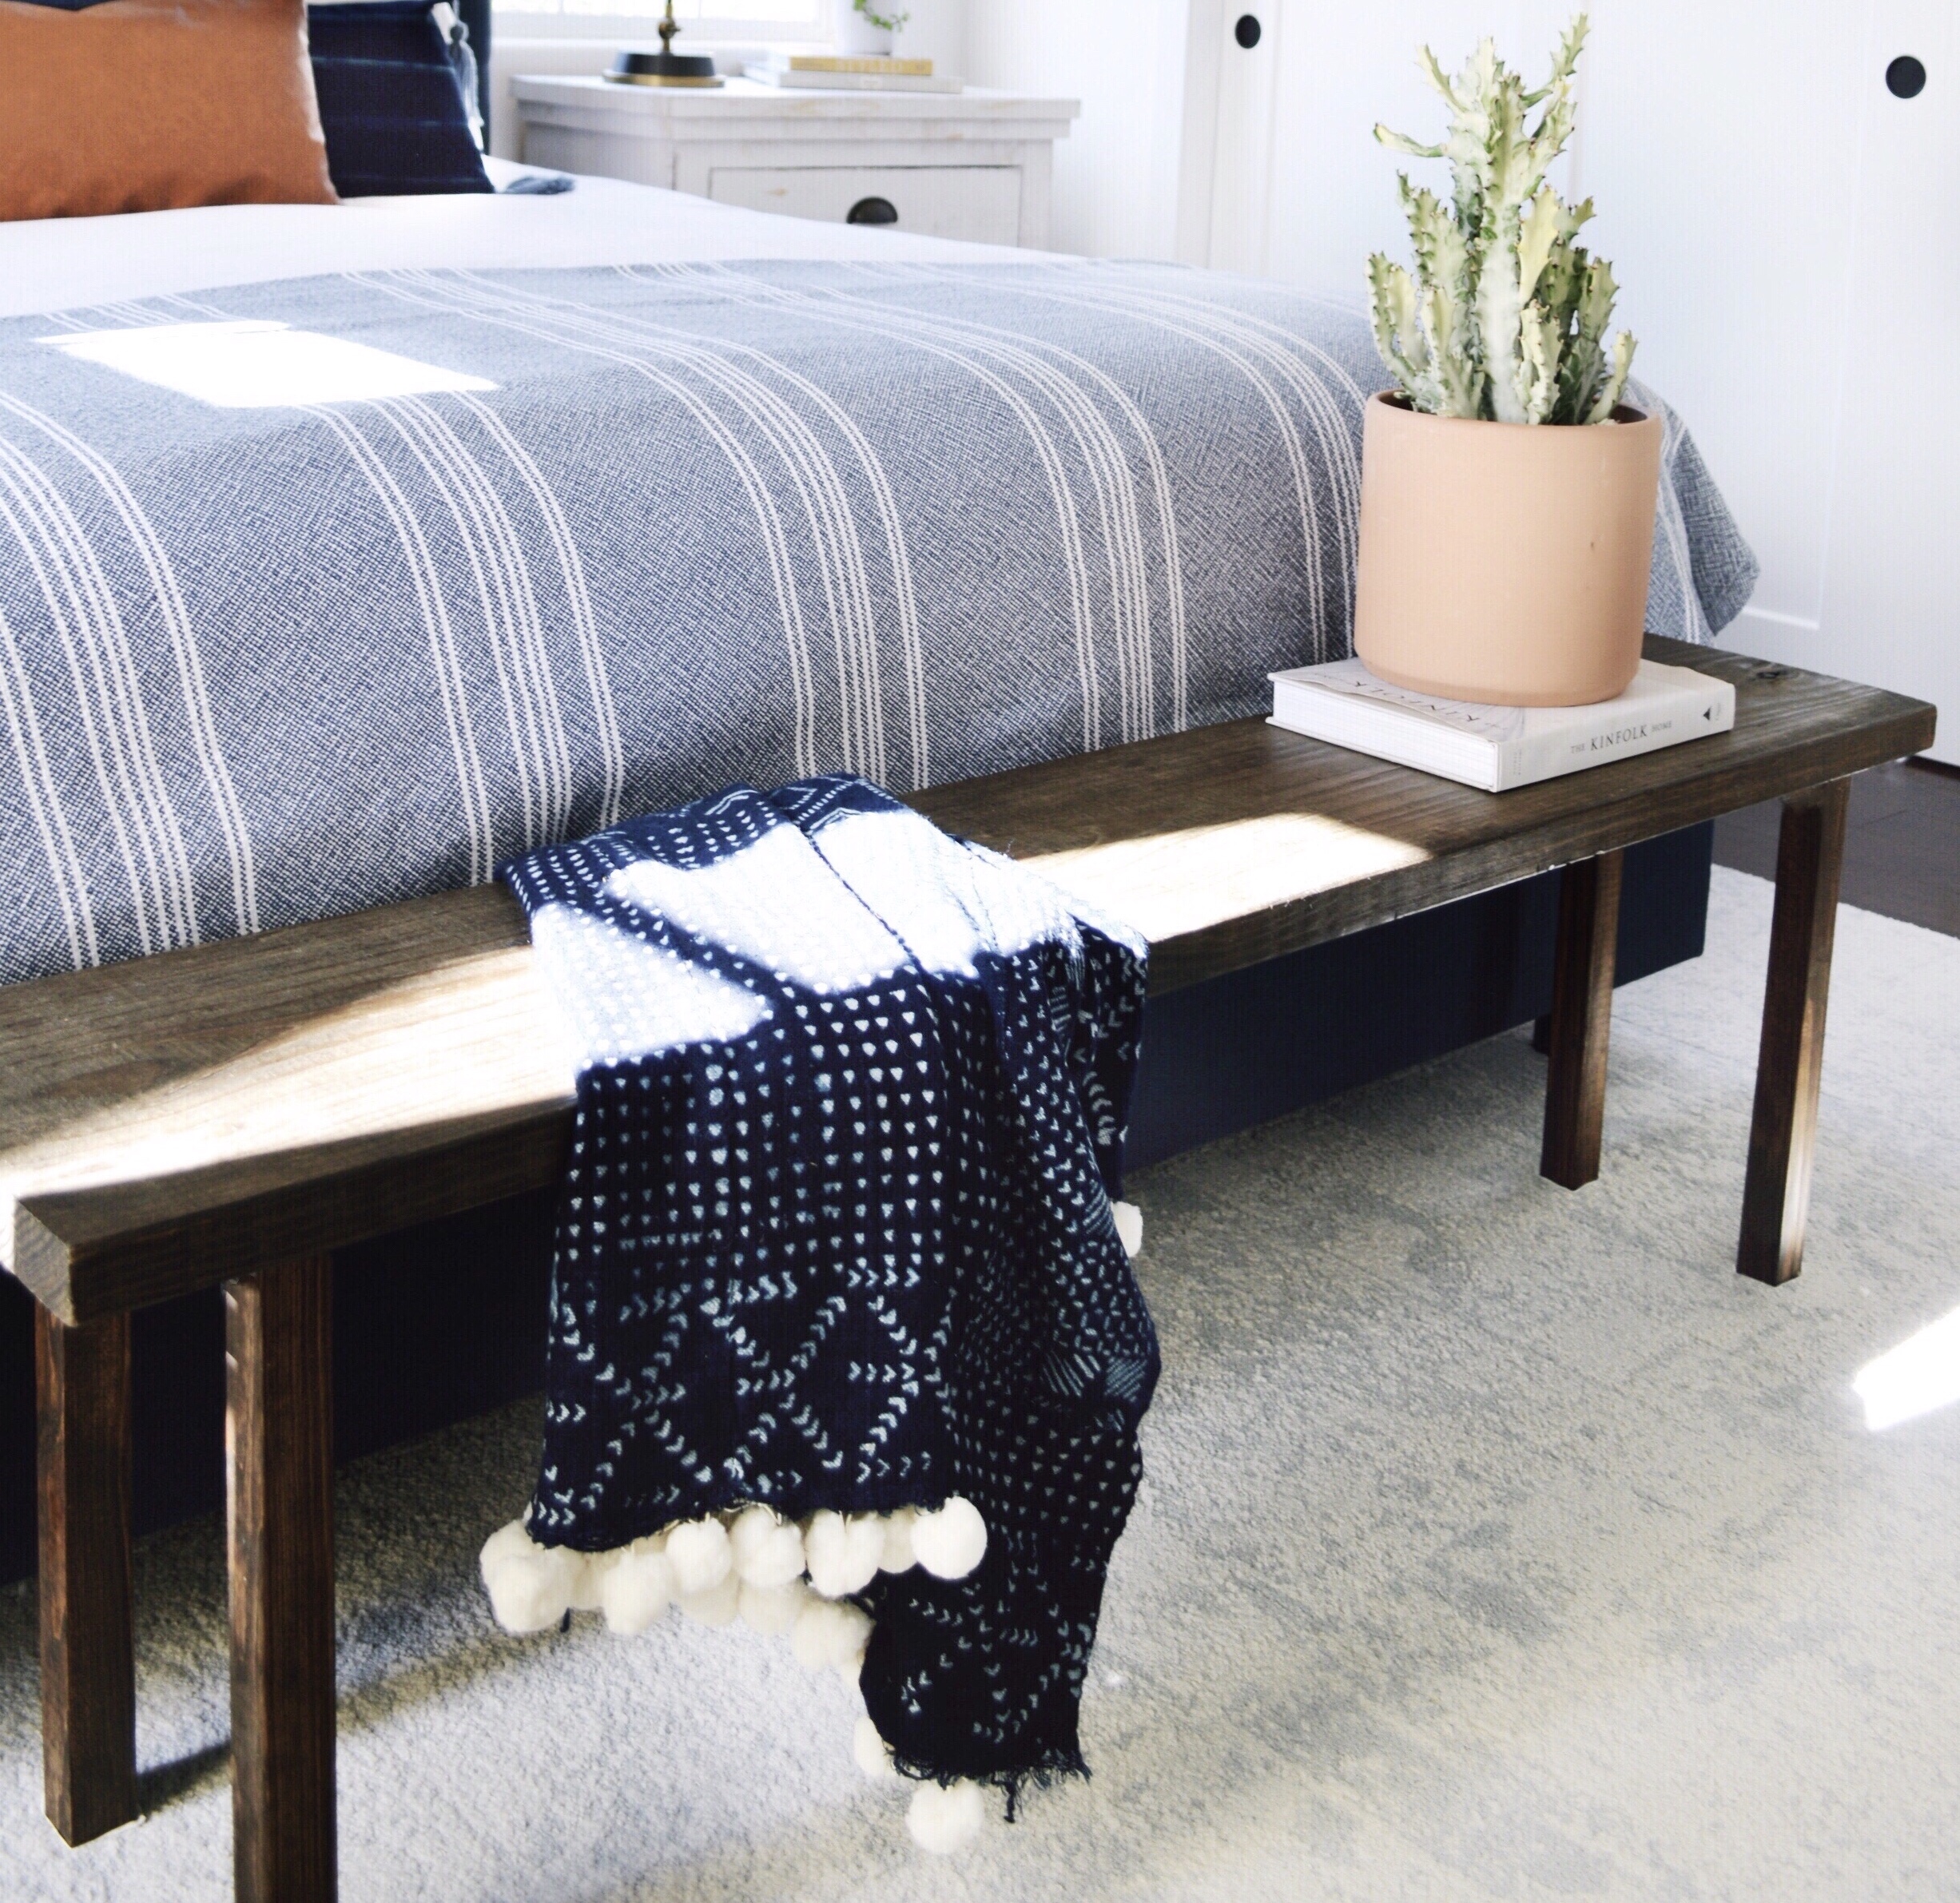
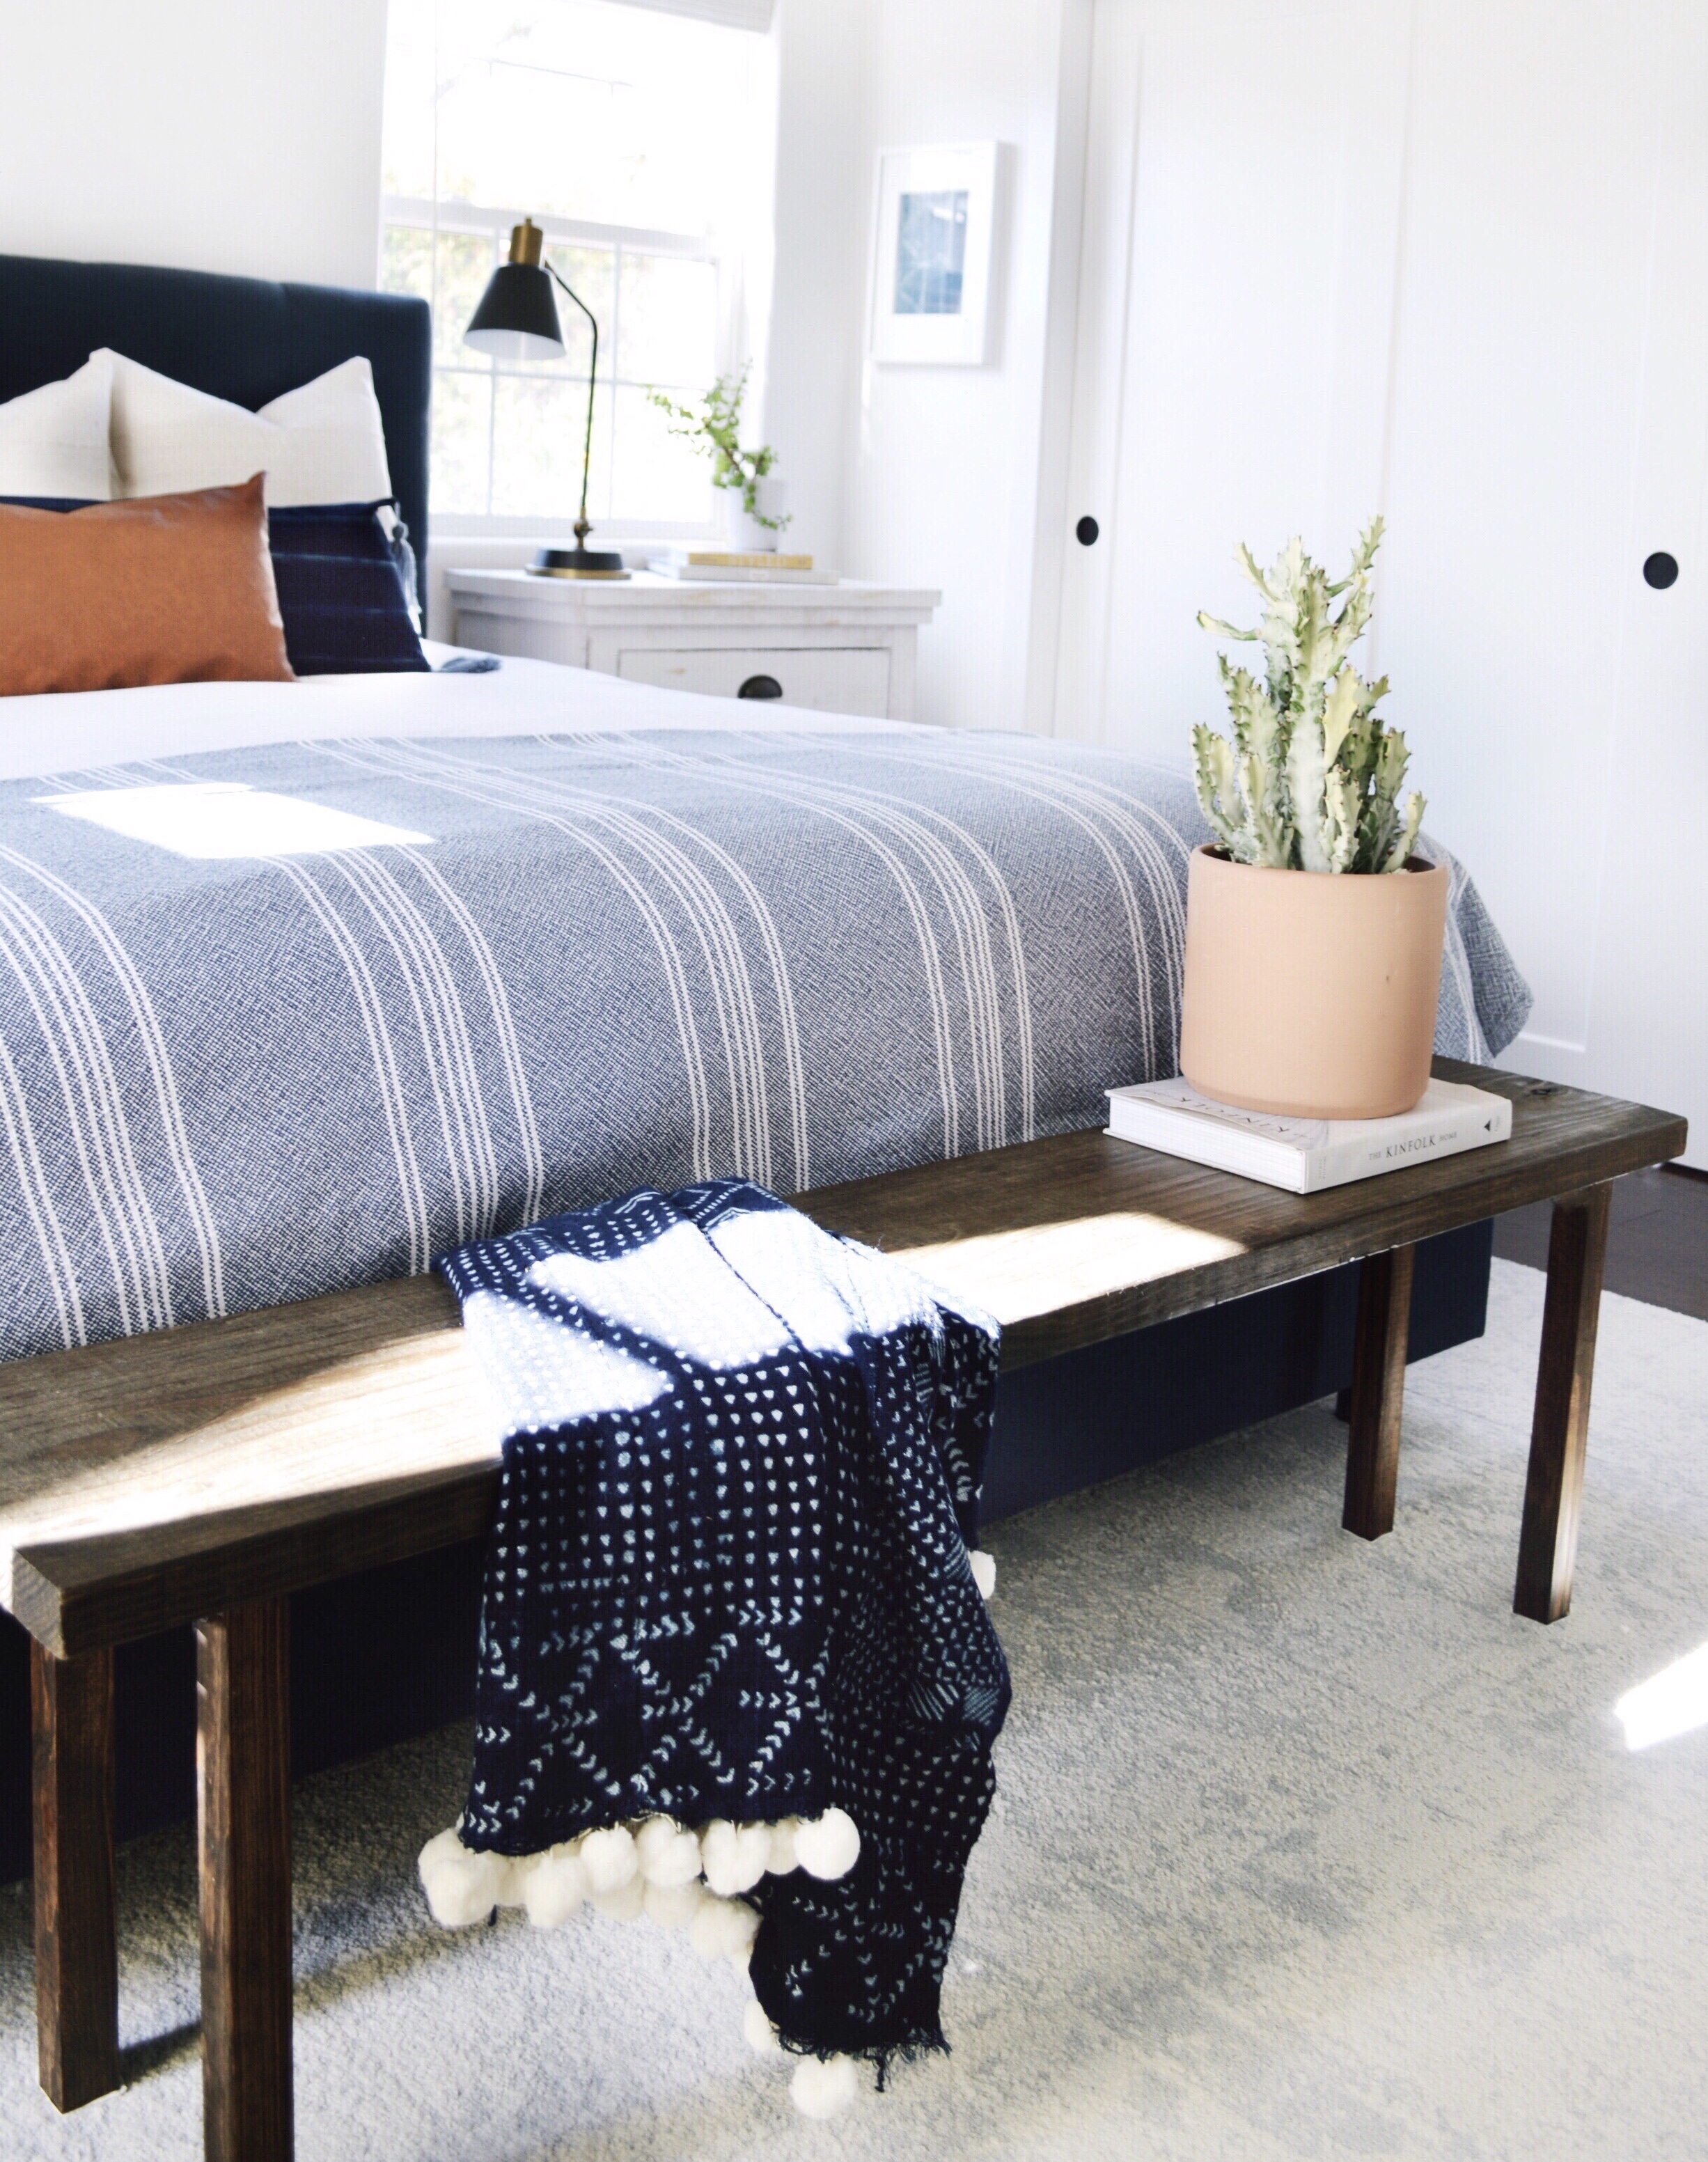
I’m working on a little master bedroom refresh and wanted to add a bench to the end of our bed. The thought process was — it will look pretty in pictures and will be a new home for “folded laundry that isn’t put away yet.” I found the perfect bench from Scandis furniture called the Raholt bench but it is backordered. I’m impatient. So I built a bench. The best part? It cost me less than $40! In case you want to build an easy bench too, here is everything I bought from Home Depot:
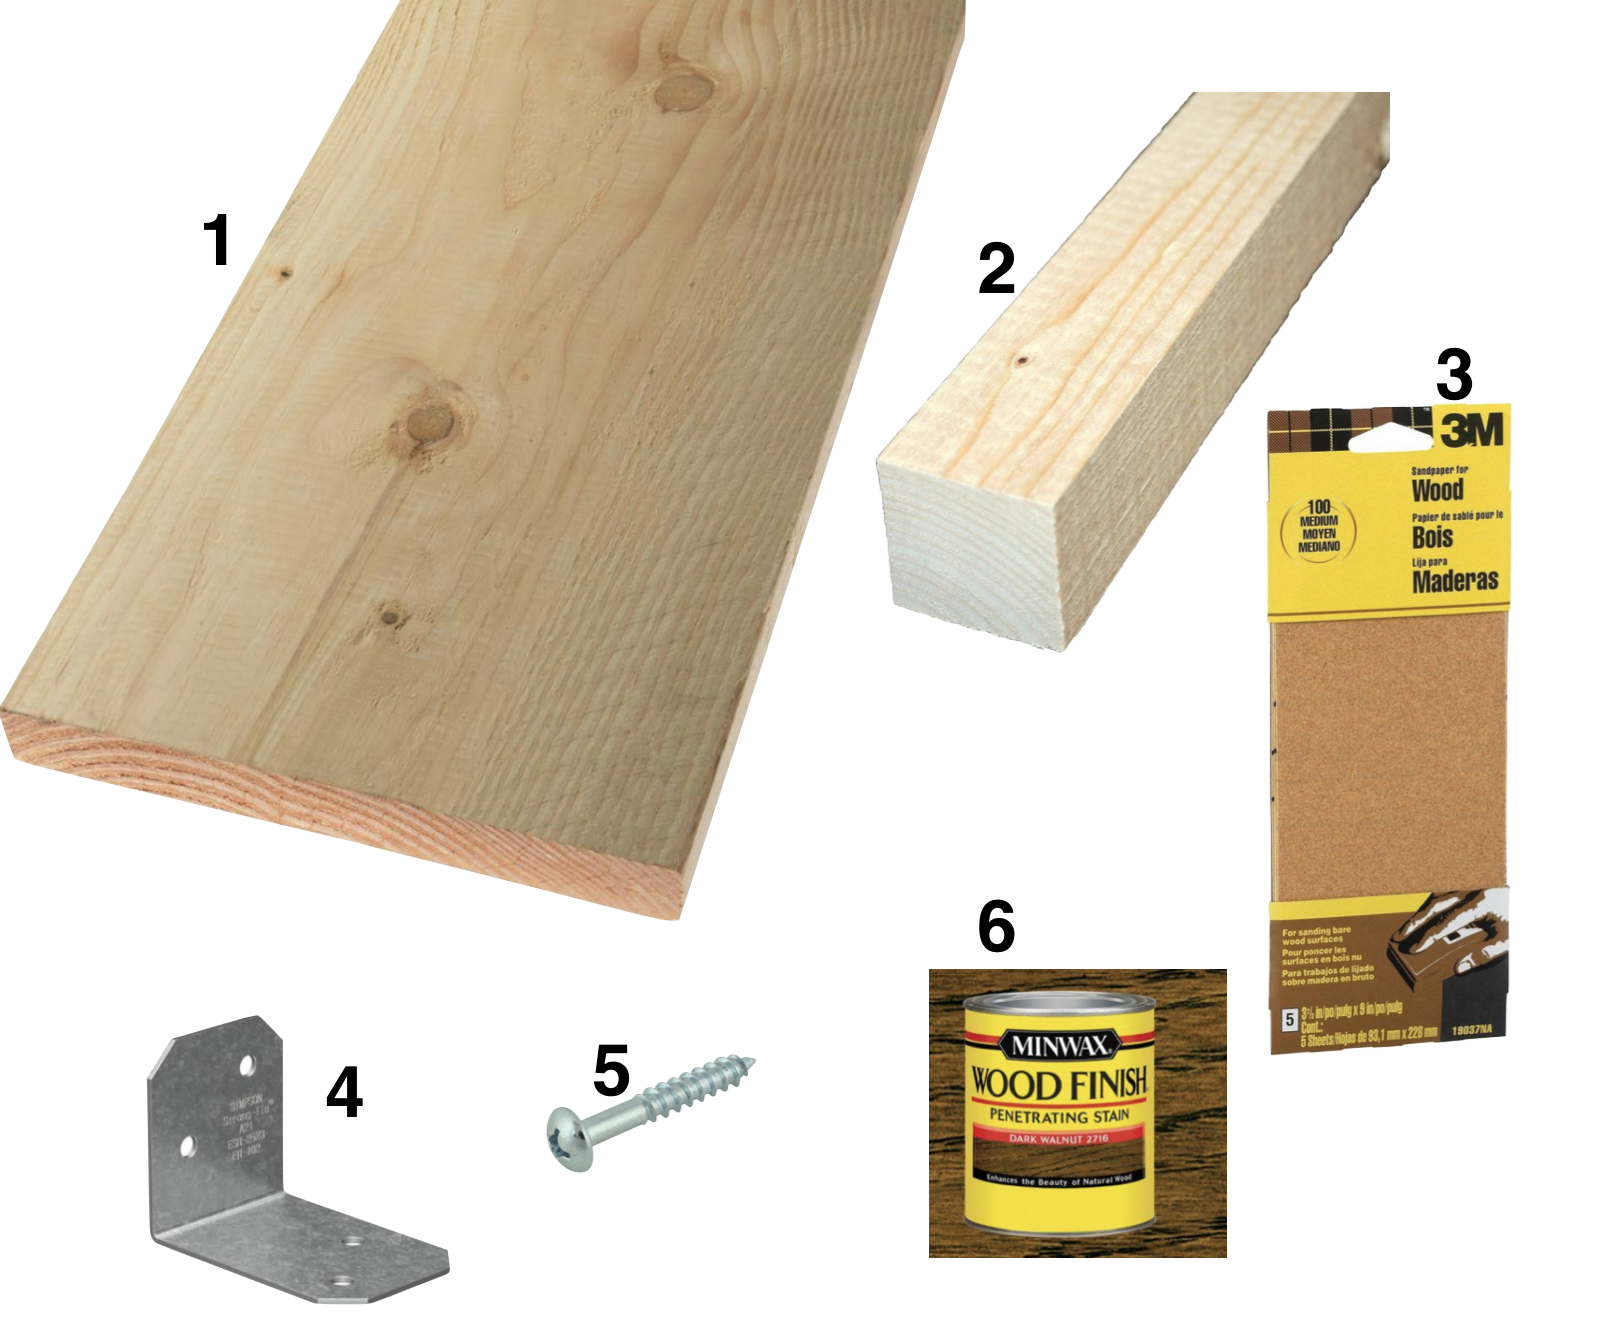
Supplies (click each for link):
1. One 2 in. x 12 in. x 10 ft. Premium #2 and Better Douglas Fir Lumber for $18.98
2. One 2 in. x 2 in. x 8 ft. Furring Strip Board for $2.07
3. Medium Grade Sand Paper $3.97 (easier if you attach it to a sanding block)
4. Eight 18-Gauge Galvanized Steel Angles for $.60/each
5. Four #6 x 7/8 in. Flat Head Phillips Zinc Wood Screw (10-Piece/Bag) for $1.18/each
6. One 8 oz. Wood Finish Dark Walnut Oil Based Interior Stain for $4.98
TOTAL = $39.52
Instructions:
(1) To make this project SO MUCH EASIER, get your wood cut to the desired size at Home Depot (or wherever you purchase your products). My top piece of wood is approximately 12in wide and 5ft long (the bench seat). I had the 2x2x8 wood cut into 4 pieces measuring 16.5 inches for the bench legs.
(2) Sand all of the wood really well until it is smooth. I attached the sand paper to a sanding block, which made it very quick and easy.
(3) Use a rag to apply the wood stain on all of the pieces of wood on all sides. It helps to wear plastic gloves to prevent getting stain all over your hands. 🙂
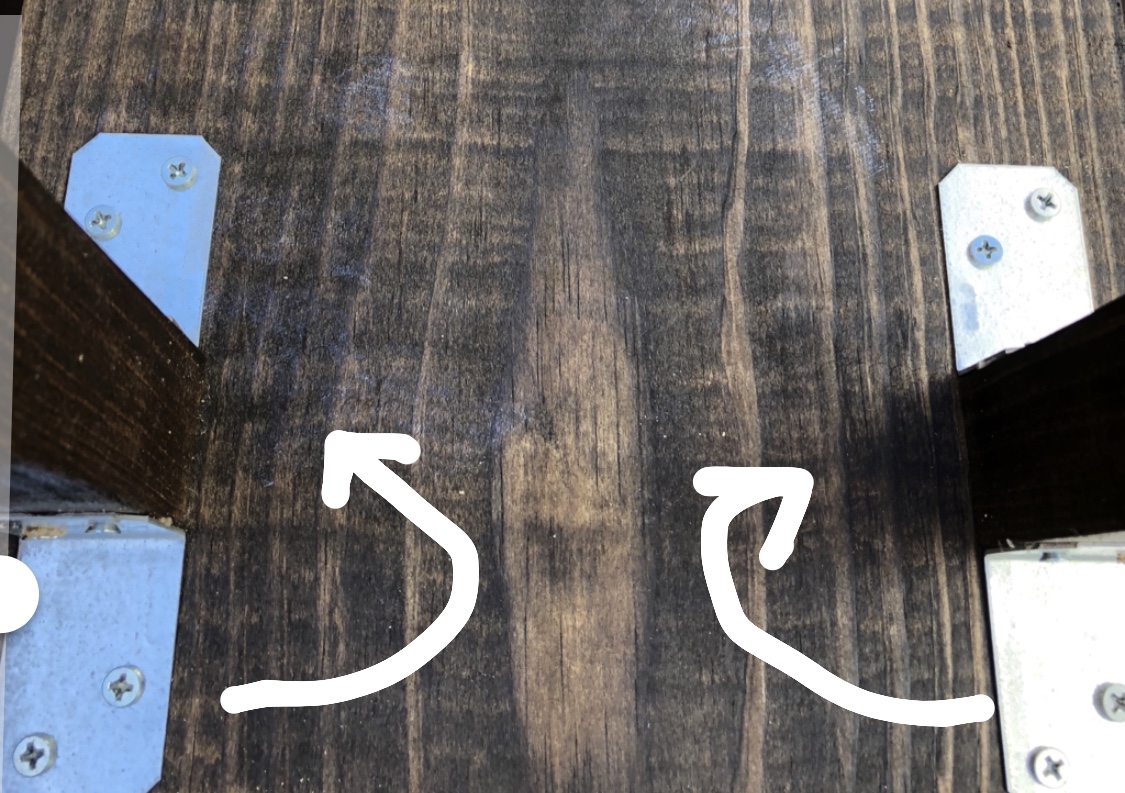
(4) Attach 2 steel angles to each leg. I used a drill to make insertion points and then used a screwdriver to screw in the wood screws to attach the angles.
(5) Approximately 1.5 inches from each corner, attach each leg to the bench seat. I should have attached my angles so that they formed an L, both facing towards the inside of the bench. Arrows show where I should have put the bottom one. Instead, the bottom ones show slightly so I used brown spray paint to disguise them.
Full disclosure – it isn’t the sturdiest bench ever but it does the job and I’m really liking it at the end of our bed. And it was less than $40 and easy to make! I love how it looks against our new rug, thanks to FLOR. You can shop the rug here. Our color is “bone.” 🙂
Thanks for reading!
xx,
Kristin